在上一篇博客中提到了观察空间的概念,这是以摄像机的视角作为场景原点时场景中所有的顶点坐标:观察矩阵把所有的世界坐标变换为相对于摄像机位置与方向的观察坐标。
为了移动摄像机的位置,我们是采取将整个场景按照反方向移动的办法。这样的方法比较简化,但是不太直观,并且如果我们想要更加精确的控制摄像机的位置,需要大量的设置。因此,可以将摄像机部分封装成一个类来进行控制。
摄像机坐标系
要定义一个摄像机,需要它在世界空间中的位置、观察的方向、一个指向它右侧的向量以及一个指向它上方的向量。这实际上创建了一个三个单位轴相互垂直的、以摄像机的位置为原点的坐标系。
摄像机位置很简单,就是希望摄像机处于的位置,用一个向量表示坐标即可。
摄像机的方向指的是摄像机指向哪个方向。假设让摄像机指向场景原点:(0, 0, 0),那么用场景原点向量减去摄像机位置向量的结果就是摄像机的指向向量。注意,方向向量与摄像机实际指向的方向是正好相反的,因为是让场景方向移动来使产生移动摄像机的效果。
右向量代表摄像机空间的x轴的正方向。为获取右向量需要先使用一个小技巧:先定义一个上向量。接下来把上向量和第二步得到的方向向量进行叉乘。两个向量叉乘的结果会同时垂直于两向量,因此会得到指向x轴正方向的那个向量(如果我们交换两个向量叉乘的顺序就会得到相反的指向x轴负方向的向量)
最后把右向量和方向向量进行叉乘获取一个指向摄像机的正y轴向量。使用这些摄像机向量就可以使用glm::lookAt创建一个view矩阵。
glm::vec3 cameraPos   = glm::vec3(0.0f, 0.0f,  3.0f);
glm::vec3 cameraFront = glm::vec3(0.0f, 0.0f, -1.0f);
glm::vec3 cameraUp    = glm::vec3(0.0f, 1.0f,  0.0f);

view = glm::lookAt(cameraPos, cameraPos + cameraFront, cameraUp);
cameraPos是摄像机位置,cameraFront表示方向向量, cameraUp表示向上的向量。
glm::LookAt函数需要一个位置、目标和上向量。目标是当前的位置加上我们刚刚定义的方向向量。这样能保证无论怎么移动,摄像机都会注视着目标方向。
摄像机移动
在上面定义的基础上,通过键盘输入来改变这些向量,就可以实现移动摄像机的效果了。
void processInput(GLFWwindow *window)
{
    if (glfwGetKey(window, GLFW_KEY_ESCAPE) == GLFW_PRESS)
    glfwSetWindowShouldClose(window, true);

    float cameraSpeed =  2.5f * deltaTime; // adjust accordingly
    if (glfwGetKey(window, GLFW_KEY_W) == GLFW_PRESS)
        cameraPos += cameraSpeed * cameraFront;
    if (glfwGetKey(window, GLFW_KEY_S) == GLFW_PRESS)
        cameraPos -= cameraSpeed * cameraFront;
    if (glfwGetKey(window, GLFW_KEY_A) == GLFW_PRESS)
        cameraPos -= glm::normalize(glm::cross(cameraFront, cameraUp)) * cameraSpeed;
    if (glfwGetKey(window, GLFW_KEY_D) == GLFW_PRESS)
        cameraPos += glm::normalize(glm::cross(cameraFront, cameraUp)) * cameraSpeed;
}
由于每个电脑性能不同,会导致有些人可能会比其他人每秒绘制更多帧,也就是以更高的频率调用processInput函数。结果就是,根据配置的不同,有些人可能移动很快,而有些人会移动很慢。
为了保证程序在所有硬件上移动速度都一样,这里使用渲染时间来作为移动速度的基准。图形程序和游戏通常会跟踪一个时间差(Deltatime)变量,它储存了渲染上一帧所用的时间。
这里将所有速度都去乘以deltaTime值。如果deltaTime很大,就意味着上一帧的渲染花费了更多时间,所以这一帧的速度需要变得更高来平衡渲染所花去的时间。使用这种方法时,无论你的电脑快还是慢,摄像机的速度都会相应平衡,这样每个用户的体验就都一样了。
可以通过两个全局变量deltaTime和lastFrame实现计算deltaTime值,在循环中调用如下代码,每次记录并保存deltaTime。
float currentFrame = glfwGetTime();
deltaTime = currentFrame - lastFrame;
lastFrame = currentFrame;
在处理键盘函数中,当按下WASD键的任意一个,摄像机的位置都会相应更新。
如果向前或向后移动,就把位置向量加上或减去方向向量。
如果向左右移动,使用叉乘来创建一个右向量,并沿着它相应移动就可以了。这里对右向量进行了标准化。如果没对这个向量进行标准化,最后的叉乘结果会根据cameraFront变量返回大小不同的向量。这样就得根据摄像机的朝向不同加速或减速移动了,但如果进行了标准化移动就是匀速的。
注意,为了使得这个函数发挥作用,应当在game循环中主动调用它。
摄像机旋转
为了能够改变视角,需要根据鼠标的输入改变cameraFront向量。这里,使用欧拉角来表示三维空间中的角度。
欧拉角(Euler Angle)是可以表示3D空间中任何旋转的3个值,由莱昂哈德·欧拉(Leonhard Euler)在18世纪提出。一共有3种欧拉角:俯仰角(Pitch)、偏航角(Yaw)和滚转角(Roll)。每个欧拉角都有一个值来表示,把三个角结合起来就能够计算3D空间中任何的旋转向量。
俯仰角是描述如何往上或往下看的角,偏航角表示往左和往右看的程度,滚转角代表如何翻滚摄像机。在这里,只使用俯仰角和偏航角,不去考虑反转。
这两个角的计算并不复杂,这里不去介绍其数学知识,直接给出计算公式:
front.x = cos(glm::radians(pitch)) * cos(glm::radians(yaw));
front.y = sin(glm::radians(pitch));
front.z = cos(glm::radians(pitch)) * sin(glm::radians(yaw));
接着,通过鼠标(或手柄)移动获得这两个角度,水平的移动影响偏航角,竖直的移动影响俯仰角。原理很简单,储存上一帧鼠标的位置,在当前帧中我们当前计算鼠标位置与上一帧的位置相差多少。如果水平/竖直差别越大那么俯仰角或偏航角就改变越大,也就是摄像机需要移动更多的距离。
首先,通过glfwSetInputMode设置隐藏并捕捉光标位置。接着注册鼠标移动的回调函数,在这个函数中负责处理计算欧拉角并改变cameraFront向量。
glfwSetInputMode(window, GLFW_CURSOR, GLFW_CURSOR_DISABLED);
glfwSetCursorPosCallback(window, mouse_callback);

void mouse_callback(GLFWwindow* window, double xpos, double ypos){
    if(firstMouse)
    {
        lastX = xpos;
        lastY = ypos;
        firstMouse = false;
    }

    float xoffset = xpos - lastX;
    float yoffset = lastY - ypos;
    lastX = xpos;
    lastY = ypos;

    float sensitivity = 0.05;
    xoffset *= sensitivity;
    yoffset *= sensitivity;

    yaw   += xoffset;
    pitch += yoffset;

    if(pitch > 89.0f)
        pitch = 89.0f;
    if(pitch < -89.0f)
        pitch = -89.0f;

    glm::vec3 front;
    front.x = cos(glm::radians(yaw)) * cos(glm::radians(pitch));
    front.y = sin(glm::radians(pitch));
    front.z = sin(glm::radians(yaw)) * cos(glm::radians(pitch));
    cameraFront = glm::normalize(front);
}
这里使用了两个全局变量lastX和lastY来记录在程序中储存上一帧的鼠标位置。
鼠标移动回调函数中,首先判断是否是第一次调用,获取初始位置。
接着通过获取的鼠标位移来计算偏移角度,由于鼠标位移对应到角度中的值太大了,转向速度过快,因此为其添加一个灵敏度用于控制。
最后改变欧拉角并使用改变后的欧拉角计算新的cameraFront向量。
注意,由于俯仰角在90度时视角会发生逆转,这里对其限制为-89到89的范围。这样能够保证用户只能看到天空或脚下,但是不能超越这个限制。
摄像机缩放
在之前的例子中介绍过视野或fov定义了可以看到场景中多大的范围。当视野变小时,场景投影出来的空间就会减小,产生放大了的感觉。
这里,按照一般使用鼠标滚轮来控制缩放。同样的,需要定义一个鼠标滚轮的回调函数。
glfwSetScrollCallback(window, scroll_callback);

void scroll_callback(GLFWwindow* window, double xoffset, double yoffset)
{
  if(fov >= 1.0f && fov <= 90.0f)
    fov -= yoffset;
  if(fov <= 1.0f)
    fov = 1.0f;
  if(fov >= 90.0f)
    fov = 90.0f;
}
首先,注册下鼠标滚轮的回调函数。
这里使用一个全局变量fov来记录视野范围。
当滚动鼠标滚轮的时候,yoffset值代表竖直滚动的大小。当scroll_callback函数被调用后,改变全局变量fov变量的内容。限制下缩放的范围以保证显示效果。
相应的,在循环中设置每一帧的project矩阵:
projection = glm::perspective(glm::radians(fov), 800.0f / 600.0f, 0.1f, 100.0f);
到这里,已经实现了所有的摄像机操作,获得了一个类似fps游戏中的摄像机了。
封装成摄像机类
基本上而言,就是将上述的操作都抽象成接口,并将需要的数据定义成成员变量。
// Camera.h
#pragma once

#include <glm/glm.hpp>
#include <glm/gtc/matrix_transform.hpp>
#include <glm/gtc/type_ptr.hpp>

#include <vector>

enum Camera_Movement {
    FORWARD,
    BACKWARD,
    LEFT,
    RIGHT
};
// Default camera values
const float YAW = -90.0f;
const float PITCH = 0.0f;
const float SPEED = 5.5f;
const float SENSITIVITY = 0.1f;
const float ZOOM = 45.0f;

class Camera
{
private:
    glm::vec3 Position;
    glm::vec3 Front;
    glm::vec3 Up;
    glm::vec3 Right;
    glm::vec3 WorldUp;

    // euler Angles
    float Yaw;
    float Pitch;
    // camera options
    float MovementSpeed;
    float MouseSensitivity;
    float Zoom;

    // calculates the front vector from the Camera's (updated) Euler Angles
    void updateCameraVectors();

public:

    Camera(glm::vec3 position = glm::vec3(0.0f, 0.0f, 0.0f), glm::vec3 up = glm::vec3(0.0f, 1.0f, 0.0f), float yaw = YAW, float pitch = PITCH) : Front(glm::vec3(0.0f, 0.0f, -1.0f)), MovementSpeed(SPEED), MouseSensitivity(SENSITIVITY), Zoom(ZOOM)
    {
        Position = position;
        WorldUp = up;
        Yaw = yaw;
        Pitch = pitch;
        updateCameraVectors();
    }
    // constructor with scalar values
    Camera(float posX, float posY, float posZ, float upX, float upY, float upZ, float yaw, float pitch) : Front(glm::vec3(0.0f, 0.0f, -1.0f)), MovementSpeed(SPEED), MouseSensitivity(SENSITIVITY), Zoom(ZOOM)
    {
        Position = glm::vec3(posX, posY, posZ);
        WorldUp = glm::vec3(upX, upY, upZ);
        Yaw = yaw;
        Pitch = pitch;
        updateCameraVectors();
    }

    glm::mat4 GetViewMatrix();

    float Getzoom();

    void ProcessKeyboard(Camera_Movement direction, float deltaTime);

    void ProcessMouseMovement(float xoffset, float yoffset);

    void ProcessMouseScroll(float yoffset);

};


// Camera.cpp
#include "Camera.h"

void Camera::updateCameraVectors()
{
    // calculate the new Front vector
    glm::vec3 front;
    front.x = cos(glm::radians(Yaw)) * cos(glm::radians(Pitch));
    front.y = sin(glm::radians(Pitch));
    front.z = sin(glm::radians(Yaw)) * cos(glm::radians(Pitch));
    Front = glm::normalize(front);
    // also re-calculate the Right and Up vector
    Right = glm::normalize(glm::cross(Front, WorldUp));  // normalize the vectors, because their length gets closer to 0 the more you look up or down which results in slower movement.
    Up = glm::normalize(glm::cross(Right, Front));
}

glm::mat4 Camera::GetViewMatrix()
{
    return glm::lookAt(Position, Position + Front, Up);
}

float Camera::Getzoom()
{
    return Zoom;
}

void Camera::ProcessKeyboard(Camera_Movement direction, float deltaTime)
{
    float velocity = MovementSpeed * deltaTime;
    if (direction == FORWARD)
        Position += Front * velocity;
    if (direction == BACKWARD)
        Position -= Front * velocity;
    if (direction == LEFT)
        Position -= Right * velocity;
    if (direction == RIGHT)
        Position += Right * velocity;
}

void Camera::ProcessMouseMovement(float xoffset, float yoffset)
{
    xoffset *= MouseSensitivity;
    yoffset *= MouseSensitivity;

    Yaw += xoffset;
    Pitch += yoffset;

    if (Pitch > 89.0f)
        Pitch = 89.0f;
    if (Pitch < -89.0f)
        Pitch = -89.0f;

    // update Front, Right and Up Vectors using the updated Euler angles
    updateCameraVectors();
}

void Camera::ProcessMouseScroll(float yoffset)
{
    Zoom -= (float)yoffset;
    if (Zoom < 1.0f)
        Zoom = 1.0f;
    if (Zoom > 90.0f)
        Zoom = 90.0f;
}
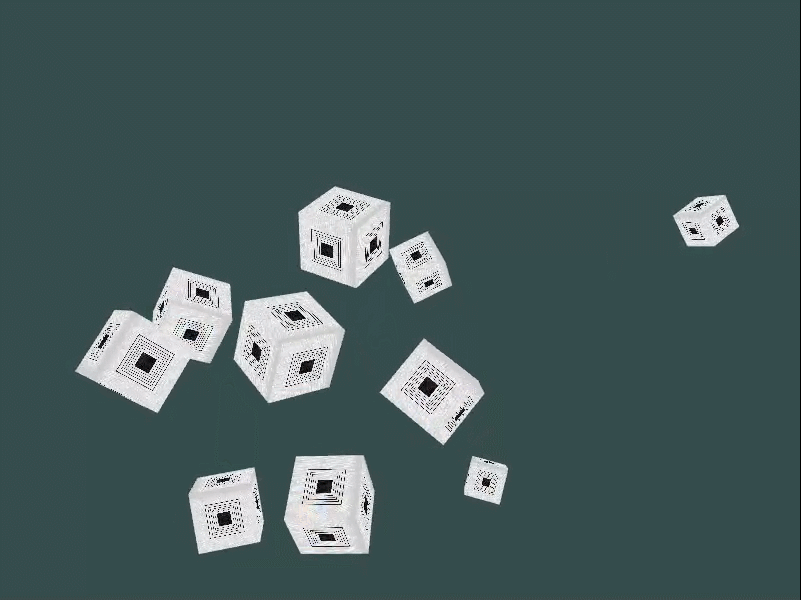
最终效果如下:
参考资料
[1] https://learnopengl-cn.readthedocs.io/zh/latest/01%20Getting%20started/03%20Hello%20Window/
[2] http://bit.ly/2lt7ccM